About Me

Of the many things in life that are worth being passionate about, there are a few on which my life seems to focus: cooking, writing, and transgender education & activism. This blog will, over time, become a place where these passions get together for a bite to eat. My recipes will focus on foods that are in season and available locally from where I live in upstate NY... but with occasional voyages into truly decadent and inexcusable foodstuffs. The musings that accompany the recipes are for entertainment purposes only.

28 November 2010

Roasted Poblano Corn Muffins

Okay, so I decided that black bean soup (http://bit.ly/fimd0P) was a great idea... but that it would be an even better idea if it was served next to some cornmeal muffins. Argue with me if you dare: I'm pretty sure I'm right.

Unlike many baked items, the batter for corn muffins can be altered in any number of ways and still turn out perfectly. Feel free to fold in chopped veggies, bacon, or ham (be sure to cook these ingredients first!). When corn is back in season next summer, add some diced fresh corn. Add a teaspoon or two of diced fresh herbs, or (if you want your muffins to be particularly zesty) 2 t of chili powder and 1/2 t of cumin. And, of course, some grated cheese also works well in this recipe. For any of these variations, just substitute whatever addition(s) you've decided upon for the poblano pepper and fold them in during step 3.

However, I decided to keep it fairly simple tonight, since the black bean soup is already hearty and flavorful. So, I roasted one poblano pepper (for info on roasting peppers, visit my previous post on "Spinach, Mushroom, Kalamata and Roasted Pepper White Pizza," http://bit.ly/ghDRsq).

One warning: this recipe makes a batter that is thinner than many muffin batters. Don't worry. It will be okay. :-)

All other hints and tips are worked right into the recipe. And that's that: enjoy!

Roasted Poblano Corn Muffins

  • 1 1/4 c yellow cornmeal
  • 1 1/4 c sifted all-purpose flour
  • 2/3 c granulated sugar
  • 2 t baking powder
  • 1 t baking soda
  • 1/2 heaping t salt
  • 1 c sour cream
  • 1 c milk
  • 4 eggs, beaten
  • 1 stick butter, melted
  • 1 roasted poblano pepper, diced
  1. Combine the dry ingredients with a whisk.
  2. Mix together the sour cream, milk, eggs and butter. Add to the dry ingredients and stir just until blended.
  3. Fold in the poblano pepper.
  4. Portion into a greased muffin tin, filling approximately two-thirds full.
  5. Bake at 375 degrees F until done, approximately 20 to 25 minutes.

Vegan Black Bean Soup

There is a thin layer of snow on the tarp that covers the wood for our stove. The cats are sleeping, curled up in a shameless display of relaxation.  It is definitely a good night for a hot and hearty soup.

After a fairly lengthy debate with myself regarding what soup to make, I decided upon black bean soup.

Black beans have a rich, satisfying flavor that is simply perfect on a cold evening. They are an incredible source of folate (a B vitamin), dietary fiber, tryptophan (an amino acid), protein, magnesium, thiamin (another B vitamin), and phosphorus: they are also a very good source of iron. The fiber level in black beans is high enough that it has been shown in several studies to lower cholesterol levels and maintain healthy blood sugar levels. Black beans also contain molybdenum, which has been shown to help detoxify sulfites. If you combine them with brown rice (and yes, this recipe is great served over rice), they supply you with complete protein amino acids. A study published in Food Chemistry and Toxicology concluded that regular consumption of black beans results in "a clear reduction in pre-cancerous cells." Regular consumption of legumes such as black beans has also been correlated with a significant (up to 82%) reduction in the risk of heart disease. And, as if that wasn't enough, black beans have been proven to contain 10 times the number of antioxidants in a comparable amount of oranges. Pretty nifty, eh?

(I now have visions in my head of all the healthy, not-taking-any-shit, 90+ year-old trannies that will be running around the world in the years to come, changing the world for the better, thanks to recipes like this one!)

And yet... you may be aware that beans are well-known for making a certain bodily orifice considerably more vocal and, ummmmm, fragrant. However, there is an easy way to minimize the gaseous potential of these nutritionally heroic legumes. When you cook them yourself (as you will do when you follow this recipe) instead of using canned beans, you will notice that a white foam collects on the surface of the soup. Whenever you notice a good amount of this foam, simply skim it off and discard it. It's just that simple: now you can enjoy all of the nutritional benefits while minimizing the odorous aftermath. Huzzah!

To soak the beans, either cover them in warm water and allow them to soak overnight, or else add them to boiling water, remove from heat, and allow to sit for 1-2 hours. Either way, make sure you use enough water to cover the beans with about 3 inches of water above the surface of the beans. In addition to shortening their cooking time, this will also help reduce the amount of gas that the beans will produce.

One more thing about the beans: do not-- I repeat, do not-- add the salt or the lime zest and juice until after the beans are fully cooked. If you add salt or acid to the broth before the beans are cooked, they will take longer to cook and the beans themselves will be tougher. One more time: the beans will never soften properly if you add salt or acid to the broth before they are fully cooked. Got it? Good.

Regarding the lime that is used in the soup (as opposed to the one that is used for garnish): zest it before you juice it. It's just easier that way.

This recipe also uses roasted garlic and a roasted bell pepper. For a refresher on how to roast these two ingredients, please refer to my earlier post "Spinach, Mushroom, Kalamata and Roasted Pepper White Pizza," http://transgustatory.blogspot.com/2010/10/spinach-mushroom-kalamata-and-roasted.html.

And that's all I have to say about that. Here's the recipe:
Vegan Black Bean Soup

  • 1 pound dried black beans, soaked
  • 2 T vegetable oil
  • 1 large Vidalia onion, chopped
  • 2 Anaheim chilies, diced
  • 2 Serrano chilies, minced
  • 4 carrots, peeled and sliced at least 1/4" thick
  • 4 cloves garlic, minced
  • 1 roasted red bell pepper, chopped coarsely
  • 4 quarts (1 gallon) vegetable stock
  • 4 bay leaves
  • 1 t dried thyme
  • 1/2-1 t freshly ground pepper
  • 1 heaping t cumin
  • 1 heaping t ground coriander
  • 1 t dried oregano
  • zest of one lime
  • juice of one lime (the same lime)
  • 1 head roasted garlic
  • salt and pepper to taste
  • lime wedges (for serving)
  • fresh cilantro, chopped (for serving)
  • sour cream (or vegan substitute), optional
Skim this foam off of your soup, or you'll be sorry!
  1.  While the beans are soaking, saute the onion until soft and translucent. Add the chilies and the carrots and saute 3-5 minutes longer, until the chilies are softened and the carrots are bright orange. Add the garlic and saute 2-3 minutes longer, until fragrant. Stir in the bell pepper and remove from heat. 
  2. Combine the beans and stock in a large, heavy-bottomed stockpot and bring to a boil. Reduce heat to simmer and add the onion/chili/carrot mixture. Stir in the cumin, coriander, and oregano. 
  3. Simmer the soup, uncovered, approximately 2 1/2 to 3 1/2 hours, skimming the surface as necessary and discarding the foam (see above). The beans should be very soft, just beginning to fall apart. Add additional water if necessary. 
  4. Puree about half of the soup with the lime zest, lime juice, and roasted garlic cloves, then stir back into the remaining soup:  make sure that there are no bay leaves in the soup that you are pureeing!! Season to taste with salt and pepper. 
  5. Serve in bowls and garnish with lime wedges, cilantro, and sour cream (optional).

25 November 2010

Bread Pudding

Today, I am going to not one, but TWO Thanksgiving meals: one with a friend's wonderful family, and one with the sangha at the Zen Center.

Seriously: there are so many things for which I am grateful.  Not only do I have the ability to cook, but I have the physical capability to do it (no small thing, when we're humbly honest with ourselves), food to cook with, and so many incredible people with whom to break bread and share water.

Just for today, I am going to set aside my righteous indignation regarding the injustices in the world and my frustrations about the genocidal roots of the historical holiday, and just be grateful. After all, if even Noam Chomsky can take a day off (http://bitURL.net/auac), then I can too.

 Each of the two meals is a potluck: after all, Thanksgiving is a lot saner when everyone chips in. I am going to make two Beet, Potato and Wild Mushroom Casseroles (http://bitURL.net/auae), the subject of one of my previous blog posts. I am also going to make the following recipe for Bread Pudding, just because.

This recipe is deceptive: for as layered and exquisite as the flavor is, it is surprisingly easy to make. It is also a great recipe to help prevent food waste: whenever I get a few too many bagels, or if a loaf of bread isn't getting eaten as quickly as it usually does, I save them in the freezer rather than discarding them. Of course, it is important to wrap the bread well, so that it doesn't get freezer-burnt, and to thaw it thoroughly before using. After thawing, go ahead and double-check the flavor, just to ascertain that there is no freezer-burn taste. It's better to check now than to wish you had later.

 Because I am taking this recipe to two different celebrations, I will be baking it in two separate pie pans instead of in a 13-by-9 inch baking pan. You, too, can choose to bake it in bread pans or a Bundt pan: just be sure to be EXTRA attentive to the cooking time if you do so, because it can change quite dramatically when differently-sized pans are used.

Bread Pudding
  • 1/2 cup (slightly heaping) golden raisins
  • 1/4 c amaretto
  • 4 T butter, melted
  • 12 oz. (approx. 4-5 cups, depending on the density of the baked goods) bread, bagels, or pastries, day-old
  • 1 qt. light cream
  • 3 eggs
  • 1 2/3 c sugar
  • 1 T vanilla extract
  1. Combine the raisins and the amaretto in a small saucepan. Heat just to a simmer, cover, and set aside.
  2. Use a portion of the butter to thoroughly coat a 13-by-9 inch baking pan or two 9-inch pie pans. Reserve the remaining butter.
  3. Tear the bread into chunks and place in a large bowl. Pour the cream over the bread and set aside until soft. 
  4. Beat the eggs and sugar until smooth and thick. Add the vanilla, the remaining melted butter, and the raisins and amaretto.
  5. Toss the eegg mixture with the bread gently to blend. Pour into the pan(s) and bake at 350 degrees F until browned and almost set, approximately 45 minutes. 
  6. Serve warm.

13 November 2010

Saag Paneer

-please feel free to enter your own clever anecdote here: I am busy doing mundane tasks such as laundry, which has left me satisfied, but not particularly inspired.-

This recipe is yummy. It is healthy. It elevates spinach to a whole different plane of delicious. Try it sometime.

Saag Paneer
  • 20 oz. baby spinach leave, washed and rinsed well
  • 4 t butter or ghee, divided
  • 4 t coconut oil or grapeseed oil, divided
  • 24 oz. paneer (you can make your own or purchase it from good grocery stores and/or Indian grocery stores: in Rochester, I recommend India House Food & Imports Store: http://www.indiahouse.com/StoreProducts/Store_Menu.htm)
  • 1 medium onion, chopped
  • 1" piece ginger, peeled and chopped
  • 3 small green chilies
  • 1 t curry  powder
  • 2-3 t garam masala (like the paneer, this can be found at India House Food and Imports)
  • 1 t cumin
  • 1-2 c plain yogurt (preferably whole-milk yogurt: again, go to India House), as needed
  • Salt, to taste
  • 1/2 c chopped cilantro
  • 1/2 c chopped parsley
  • 1/2 c golden raisins, soaked in HOT water about 10 minutes to soften (optional)
  • Cooked basmati or jasmine rice
  • Naan bread (optional)
  1. Steam the spinach quickly, just until soft and bright green. Drain and set aside.
  2. Heat 1 teaspoon each of butter (or ghee) and oil over medium heat in a large, nonstick pan.Add half the paneer, frying until each square is browned on two or more sides, turning the paneer and shaking the pan occasionally: this will take about 10 minutes . Remove from pan, set aside, and repeat with the remaining paneer.
  3. Wipe out the pan. Heat the remaining butter (or ghee). Add the onion and saute until nearly translucent. Add the ginger, garlic and chilies and saute until onions are completely soft and translucent, 3-5 minutes more.
  4. Add the curry, garam masala, and cumin. Stir until fragrant, about 1 minute.
  5. Add the cooked spinach to the pan, stirring until well-blended. Transfer mixture to a food processor and add enough yogurt to render the mixture creamy. Pulse until smooth, but not pureed.
  6. Return to pan. Stir in paneer, cilantro, and parsley. Adjust salt and seasonings to taste. Heat gently until the paneer softens somewhat.
  7. Serve over rice with naan bread. Sprinkle with softened golden raisins, if desired.

11 November 2010

Vegan Chipotle Chili

I have been on a major comfort-food kick recently. I am guessing that this has something to do with a combination of factors, including (but not limited to): the colder weather, the shorter days, the general busy-ness of life, and the increasing frequency that I have been speaking out in the community.

Most of which are completely self-explanatory, except for perhaps the final one. That last factor is significant because, truth be told, I get nervous when speaking in front of a group of people. Don't get me wrong: I'm good at public speaking. I'd just rather do my collocating, exhortating, educating and illuminating through writing. I like to take my time with the words and thoughts, allowing them to come together in their own time. If I can do this quietly while at home, next to the wood-burning stove and with my cat Fauxgerty on my lap, so much the better.

But far be it from me to turn down an opportunity to present my experiences and knowledge to the world, especially when there is a chance that my experiences and knowledge offer some potential for healing in the world, knock on wood. 

As a result, I have facilitated discussions on how to encourage and develop trans-inclusive language, how to make effective public service announcement videos, and how to come to terms with one's gender identity, all within the last month. I have also been recently interviewed on multiple occasions by multiple media outlets on my experiences with bullying and surviving through struggles with depression (check out my previous "About Me" post to watch the video I made for the It Gets Better Project: http://transgustatory.blogspot.com/2010/10/it-gets-better-letter-to-myself-at-17.html).

I am, above all, grateful for these opportunities to encourage discussions on these very important topics: however, I also tend to get very stressed out and nervous during the preparation and delivery of any sort of public speaking situations.

And, as I have said before and said again, the energy we take into our bodies has a direct effect upon the energy we have to give to the world. So, given all the busy-ness and stress, when I have gotten cravings for homemade comfort foods, I haven't been holding back. And when it comes to chilly evenings, sometimes nothing beats a steaming bowl of spicy chili.

This is another failure-proof recipe. Use whatever veggies you want, as long as you use the same total volume that is called for in the recipe (if you decide to use spinach, be sure to cook it before you measure it! It cooks down a LOT). Also, for the most satisfying chili, be sure to leave the veggies in nice, big, hearty chunks.

There is one ingredient that may strike you by surprise: unsweetened chocolate. As I mention in the list of ingredients, vegans should be very mindful to select a vegan brand. Any 100% cocoa baking chocolate should be vegan, and is actually what I recommend most strongly: when you start getting into the 95% and under chocolates, you have to be sure to check what that other percentage consists of!

The chocolate melts completely into the broth, giving the finished chili a mole-like quality that is simply divine. Simply trust, and enjoy.

(A quick note to new new readers, which will also serve as a disclaimer for the photo below: no, I am not a vegan, hence the appearance of real sour cream and cheese on my bowl of chili. However, in my efforts to prepare foods with mindfully-selected ingredients, a large percentage of the foods I make are vegetarian and/or vegan. I hope that these recipes can be enjoyable to you, without there being any offense taken at the recipes that do include dairy, egg, and meat products....)

Vegan Chipotle Chili
  • 2 T olive oil
  • 1 c chopped onion (Spanish or Vidalia)
  • 1 c chopped carrots
  • 1 c chopped red bell pepper
  • 1 c green or yellow bell pepper
  • ½ of a head of garlic, chopped
  • Approx. ½ of a 7-oz. can of chipotles in adobo sauce (to taste), pulsed in a food processor until finely chopped (VEGANS: this is almost always vegan, but read the ingredients just in case! If you can't find a brand that you are confident is vegan, just soak 2-3 dried chipotles in boiling water for 10-15 minutes, then dice.)
  • 1 T chili powder
  • 1 T ground cumin
  • 2 T cider vinegar
  • 10 whole black peppercorns, ground
  • ¼-1/2 t ground allspice, to taste
  • ¼-1/2 c ground cloves, to taste
  • 2 large bay leaves
  • 2 t salt, or to taste
  • 2 t ground cinnamon
  • Cayenne pepper to taste
  • One 28-oz. can diced tomatoes
  • Three 16-oz. cans beans (I recommend one each of black beans, pink beans, and cannellini beans)
  • 1-3 c tomato juice
  • 1 oz. unsweetened chocolate, chopped (VEGANS: be mindful of what brand you get to ascertain it is, in fact, vegan: this can be omitted if you have any doubts)
  • 1 avocado, in bite-sized pieces (optional)
  • coarsely chopped cilantro (optional)
  • Sour cream (or vegan substitute, optional)
  • Shredded cheddar cheese (or vegan substitute, optional)
  • Cooked spaghetti (optional)
  1. Heat the oil over medium heat in a large, heavy-bottomed soup pan. Add the onion and cook for about 5 minutes, until almost entirely translucent (but not quite). Add the carrots, bell peppers, and garlic. Cook, stirring, until the onions are golden, about 10 to 15 more minutes.
  2. Add the chipotles, chili powder, cumin, vinegar, pepper, allspice, cloves, bay leaves, salt, cinnamon, and cayenne. Cook for two to five minutes, until fragrant.
  3. Add the tomatoes, beans and 1 cup of the tomato juice. Bring to a boil. Reduce the heat to medium-low and stir in the unsweetened chocolate. Simmer, uncovered, stirring occasionally and adding tomato juice as needed, until the flavors are fully blended, AT LEAST 45 minutes. Taste and adjust the seasonings.
  4. Ladle into bowls (over cooked spaghetti, if you’d like: it’s yummy!) and serve with any combination of avocado, cilantro, sour cream and cheddar cheese that you desire.

05 November 2010

Friday Night Lasagna

Who doesn't like lasagna? I honestly can't think of anyone. I know people who can't have it, due to diet choices, food allergies or a sensitivity to aged cheeses, but I don't know anyone who just plain doesn't like it.

I am calling this "Friday Night Lasagna" because, well, that's a good day to make this particular recipe. It's a bit too labor-intensive for most weekday nights, but uses sauce from a jar instead of homemade sauce (which is how I would prefer to make it if I had the greater time availability of weekends). 

Lasagna is another very forgiving recipe: as long as you keep the same basic volume of ingredients, there is a good deal of flexibility regarding what you can use. Don't like mushrooms? Use zucchini instead. Not a fan of spinach? Use a bell pepper. Think garlic and basil are gross? Well, actually, I can't help you with that one. That just baffles me. I suppose you could leave them out, but I can't really condone it.

It is important that you use the whole milk ricotta and mozzarella in this recipe, rather than the 2% or skim versions. The whole milk cheeses have a higher moisture content than the lower-fat versions, which helps to cook the noodles and blend the flavors, while preventing the final dish from being dried out. If you absolutely must use the lower-fat versions, add 1/2-3/4 cup water to the sauce: though this, of course, will dilute the flavors somewhat.

For a truly well-balanced meal, be sure to serve this with a salad or some steamed veggies: I served it along with a steamed Romanesco broccoli, which will be the topic of a later post.

There's really not much more to say regarding tips for this recipe. Make it, and enjoy!


Friday Night Lasagna

  • 2-4 T olive oil, for sauteing
  • 1 medium onion, chopped
  • 10 oz. mushrooms, thinly sliced
  • 1/2 head of garlic, chopped
  • 12 oz. baby spinach, very coarsely chopped
  • 1/2 c coarsely chopped basil
  • 24 oz. whole milk ricotta
  • 1 egg, beaten
  • 4 c shredded whole milk mozzarella, divided
  • 1/2 c grated parmesan (plus more for sprinkling on top of lasagna when serving)
  • 1/4 c chopped parsely
  • 1-24 oz. jar Diavolo sauce (or other tomato sauce)
  • 1-23.5 oz. jar Vodka sauce
  • 1 box (9 oz.) no boil lasagna noodles
  1. Heat the olive oil in a large saucepan. Add the onion and saute until soft and translucent. Add the mushrooms. Saute until the mushrooms release their juices and the moisture evaporates. Add the spinach and saute, stirring often, just until the spinach is cooked. Remove from heat, stir in the basil, and drain.
  2. Combine the ricotta, egg, 2 cups of the mozzarella, 1/2 c parmesan, and the parsley.
  3. Combine the sauces in a large saucepan and heat to a boil.Preheat oven to 375 degrees F.
  4. Layer in the following order in a deep 9" by 13" baking dish: 1-1/2 c sauce, 4 lasagna strips, 1/2 of the ricotta mixture, 1/2 of the veggie mixture, 1-1/2 c sauce, 4 lasagna strips, the rest of the ricotta, the rest of the veggies, 1-1/2 c sauce, 4 lasagna strips, and the remaining sauce. Top with the remaining 2 cups of mozzarella.
  5. Cover the pan with aluminum foil. Bake on the center rack of the oven for 40 minutes. Remove the foil and bake approximately 15 more minutes, until the top is melted and golden brown. Let stand for 10 minutes before cutting.
  6. Serve sprinkled with some extra parmesan, if desired. 

    04 November 2010

    Salmon Turnover with Cucumber Sauce

    I apologize for how much time has passed since my last post: I was down for almost 2 weeks with a bad case of bronchitis. I am now pretty much caught up to the speed of life now, but it took a while for me to be able to have the time to sit down and type up a post.

    And actually, a couple of things happened as a result of the bronchitis that are pertinent here.

    Firstly, I quit smoking. I finally just got fed up with all of the expense and the health consequences of smoking, and it has now been almost three weeks since my last cigarette. Go, me! Since then, I have really noticed the improvement of my senses of taste and smell. I can hardly believe it: cooking and eating are even more enjoyable to me than they were before.

    Secondly, I had a lot of time to think as I was laying down, barely able to function, weary and sick with a head full of medicine: a long enough time, in fact, that I eventually got around to thinking about my priorities in life, whether I'm living up to my potential, and what I could stand to work on in order to be living the most authentic, healthy life possible. Blah, blah, blah.

    Of all the things that occurred to me as I (literally feverishly) considered my life-in-general, one was the importance of being more financially responsible. I have committed to depositing  a percentage of each and every paycheck into an IRA (the account type, not the army type), just the way real grown-ups do. No excuses, no justifications.

    And, in addition to not smoking, one of the ways that I am going to free up the funds to do so is to work to keep my food expenditures down: I spend a perhaps disturbingly high percentage of my income on yummy foodstuffs. I love yummy foodstuffs. However, I am going to be dedicating more mindfulness to feeding myself on healthy, yummy foods that are also economical.

    This recipe is going to be the first in a series of recipes that I will make that require less than $20 in purchases from Wegmans. Every recipe that I am able to make for less than $20 will be tagged with "LessThan20."

    Keep in mind that I have a fairly well-stocked kitchen, so I rarely have to purchase all of the ingredients in any given recipe. Also, these prices reflect their cost at the Wegmans stores in Rochester, NY. You may have to spend more than $20 on these recipes, depending on what you already have on-hand and the prices of items in the area where you live.

    So, yeah, that's that. Now on to the recipe that is the real focus of this post...

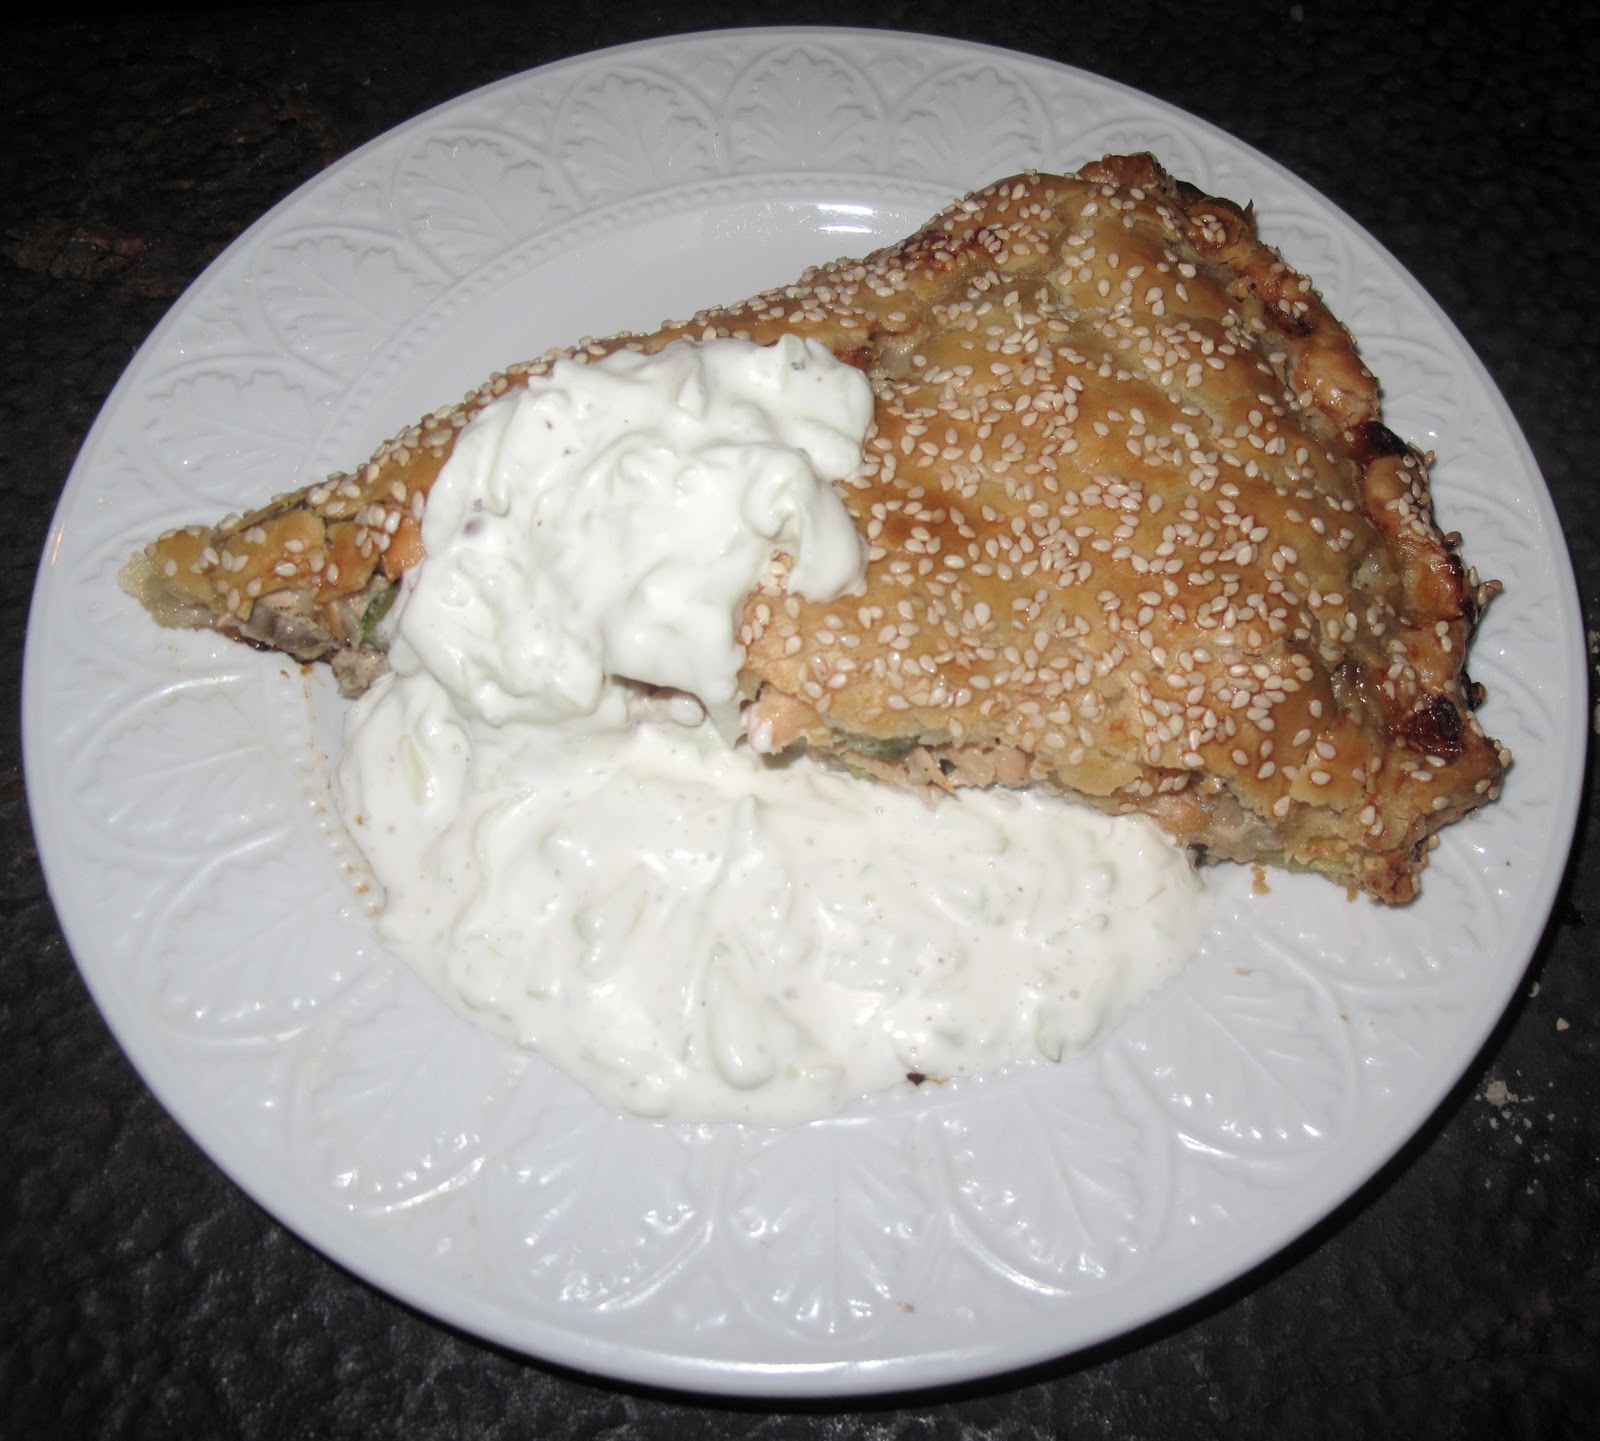
    This recipe is one that my Mom used to make sometimes, and it was always one of my favorites.It stands out in my mind as one of my favorite comfort foods. The buttery, flaky crunch of the crust; the heavenly fragrance and melty, delectable flavor of the filling; the cool smooth finish of the cucumber sauce that stands in perfect complement to the turnover... it's a pure delight to eat.

    Sadly, many years have passed since the last time I was lucky enough to have this dish. I just never remembered to ask Mom for the recipe, and so memories of this dish have taunted me and left me in a perpetual unsatisfied void of craving. -heavy sigh-

    Until earlier this week. I finally remembered to ask Mom if she could please send me the recipe for this delightful, satisfying, creamy, buttery, veggie-ful, beautiful entree with a tender, flaky crust. And, joy of joys, she found it and sent it my way.

    I decided I had waited long enough, and that I just had to make it right away. So, within 24 hours of getting the recipe, I was at Wegman's grabbing all the ingredients that I needed to create the dish that had, for so long, been haunting me with its elusiveness. The only ingredients I had to purchase were the zucchini, parmesan, mushrooms, salmon and cucumber, for a total cost of $15.24. Huzzah!

    Now, just a few helpful tips and tricks, and we can get right on to the recipe...

     You can used canned salmon if you are short on time, but it's so easy to grill salmon yourself that I recommend doing it. Just take the salmon steaks and score the skin by making several diagonal slashes approximately 1/4-inch thick. Coat the fish fairly liberally with olive oil, season lightly with salt and pepper, and place on a broiler pan with the skin side up. Broil 4-5 minutes per side, depending on the thickness of the fish.

    (You could, of course, stop right there and serve the salmon next to whatever seasonal veggies you choose to and have a lovely meal. But, really, you should go ahead and make the turnover.)

    Cut the zucchini into cubes about 1/2-3/4 inch per side. This is large enough that their color, flavor and texture stand out, but not so large that they cook unevenly and/or make the filling seem too lumpy.

    Don't fill the turnover beyond its capacity, or the crust will rip and the Senate in your home state will be taken over by Republicans (wait: did that already happen? Sigh.). Seriously, though, put in as much filling as you can, but make sure you will still be able to fold the crust over and seal it without overtaxing the fragile dough. If you have some of the filling left over, do not worry: you can saute it for a bit to cook the egg that's in it and eat it on its own. In fact, have it with some of the cucumber sauce: this can be a helpful way to fine-tune the seasoning of the sauce as you aim towards the perfect balance of flavors.

    I STRONGLY recommend using parchment paper for both the rolling out of the crust and for baking on. It is easier to roll our dough very thinly without it ripping or tearing when you use parchment paper, plus you can roll out the dough without adding additional flour (which can make the dough dry and tough. Blech.). It is beneficial for lining the baking pan, too, because you will easily be able to get the turnover from the pan to the serving plate or cutting board without damaging it. It is sad when, after working on a pastry-wrapped goody for a good chunk of time, the pastry surrounding the filling cracks into pieces. The result of such drama is usually a messy, funny-looking pile-o-gook which, while tasty, is harder to serve and sadder to look at.

    Regarding cucumbers: they are more than 90% water by weight. Thassa lotta water. And, when using them in sauces or salads, it is enough water to cause some undesired consequences: sauces can get too thin, salads can get wilted and spoiled prematurely. As a result, when I use cucumbers in sauces or salads, I always de-seed them first. This is insanely easy: just cut the cucumber in half lengthwise and, using a teaspoon, simply scoop out the seeds. The center membrane and seeds contain the runniest of the cuke's water weight, and so this one step can help keep your sauces the proper texture and your salads fresh and crisp for a longer time.

    Don't be shy with either the sesame seeds or the sauce. They take the turnover and transform it from yummy to positively delicious.

    And that's it! In case you haven't caught on by now, I really like this recipe, and I hope you will, too! Enjoy.

    Salmon Turnover with Cucumber Sauce
    • 2-3 T butter or olive oil
    • 1/2 c chopped onion
    • 1 small yellow zucchini, in smallish bite-sized cubes
    • 1 small green zucchini, in smallish bite-sized cubes
    • 4 oz. mushrooms, sliced and coarsely chopped
    • 1T flour
    • 1/2 t dried marjoram 
    • 3 or 4 sprigs of thyme, leaves only
    • 1/4 c milk or half and half
    • 1 pound grilled salmon, cooled and flaked
    • 1/4-1/2 c grated parmesan
    • salt and freshly ground pepper
    • 1 egg
    • sesame seeds
    • 1 recipe pie crust (below)
    • 1 recipe cucumber sauce (recipe below)
    1. Saute the onion in the oil or butter until it is translucent. Add the zucchini and saute 2-3 more minutes before adding the mushrooms.
    2. Add the flour, mix well, and continue cooking for a few minutes. Add the herbs and stir gently for a few more minutes before slowly adding the milk or half-and-half. Cook until smooth, fragrant and bubbly. 
    3. Stir in the salmon and the parmesan. Adjust salt and pepper to taste.
    4. Beat the egg. Add half to the filling and set the rest aside. Preheat oven to 350 degrees.
    5. Allow the filling to cool while you make the pie crust (recipe below). Form the dough into a ball and place between two sheets of parchment paper. Roll the dough into a circle with a diameter of at least 13 inches: it will be thin and fragile.Transfer the circle of dough onto a parchment paper-lined cookie sheet or pizza stone.
    6. Spoon the filling onto one half of the rolled dough, leaving a border approximately 1/2 inch deep around the edge. Be mindful to put in as much of the filling as will fit, but no more. Fold the other half of the dough over the filling and seal the edges. 
    7. Cut a few slits into the top of the pastry, brush the dough with the remaining beaten egg, and sprinkle liberally with sesame seeds.
    8. Bake 25-35 minutes, until golden brown. Serve with cucumber sauce (recipe below).
    Pie crust: 
    • 6 T cold butter, cut into small pieces
    • 1 1/2 c flour
    • 1/4 t salt
    • 4-5 T cold water or milk (more or less)
    1. Using a pastry cutter or a food processor, cut together the butter pieces and the flour until they are the consistency of rough cornmeal. Add salt.
    2. Stirring with a fork (or leaving the food processor running on low), add the liquid 1 T at a time until the dough sticks to itself: stop adding liquid as soon as the dough holds together. The natural fluxuations in humidity will affect the amount of liquid that you will need to use.
    3. Wrap the dough well in plastic wrap and chill for about 45 minutes before rolling it out.
    Cucumber Sauce:
    • 1 cucumber, peeled, seeded and shredded
    • 1/2 c sour cream
    • 1/2 c mayonnaise
    • 1 T rice vinegar
    • salt and pepper to taste
    1. Drain the shredded cucumber for a few minutes to get rid of some of the extra water.
    2. Gently mix all the ingredients together. Fine-tune the vinegar, salt and pepper to your taste. That's it!